How to Compress Images Without Losing Quality

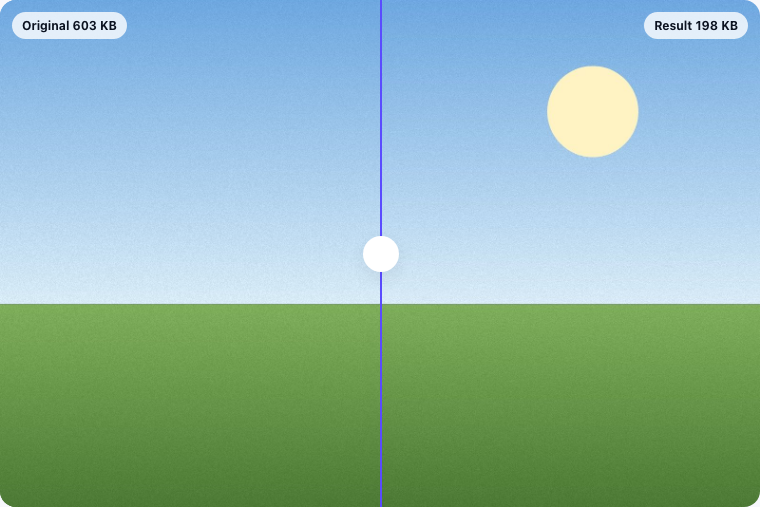
A quality setting of 80, the default on most compressors including Imagenati's own, shrinks a typical photo by 60 to 80 percent with no change visible at normal viewing size, because most of what gets discarded at that setting is detail a human eye was never going to notice in the first place. Quality loss becomes visible only once the setting drops much lower, and even then it shows up gradually rather than all at once. The rest of this guide explains why that specific range exists and how to tell, on a real image, whether compression has gone too far.
Why a large reduction does not mean a visible loss
Lossy compression, the kind JPG and WebP use, is built around how human vision actually works rather than around preserving every byte equally. It discards colour information more aggressively than brightness information, since the eye is far more sensitive to changes in brightness than to subtle colour shifts, and it compresses smooth, gradual areas more than it compresses sharp edges and fine texture, since smooth areas have far less information the eye would miss anyway. A photo that is mostly sky, skin, or an out of focus background, exactly the kind of content a real photo usually has plenty of, compresses extremely well under this approach with nothing visibly lost.
Where the line actually is
Quality 80 and above rarely shows any visible loss on a typical photo viewed at normal size. Quality 50 to 60 usually still looks fine for a thumbnail, a preview, or anything not being viewed large or zoomed in closely, though a very close look can start to reveal it. Below about quality 40, compression artefacts become genuinely visible: soft blocky patches in smooth areas like sky or skin, and a slight fuzziness around sharp edges and fine detail. Where exactly visible loss starts depends on the specific image, a simple, low detail photo tolerates a lower quality setting than a busy, highly detailed one before the difference becomes noticeable.
How to actually tell, on a specific image
The most reliable test is a direct side by side comparison at the actual size the image will be viewed at, not zoomed in past that size, since zooming in reveals differences no viewer will ever actually see at normal size. A compare slider that shows the original and the compressed result side by side, sliding between them at the same size, makes a real difference obvious if one exists and reassuring if it does not, which is more reliable than trying to judge a single image in isolation against memory of what the original looked like.
Quality mode or a target size, and why it changes the approach
Quality mode is the right choice when the goal is simply a smaller file with no visible change, drag the slider, check the compare view, stop once it looks right. Target size mode flips the priority: something external sets a hard limit, a 100 KB upload form or a 1 MB email attachment cap, and the tool searches for the highest quality that still fits under that number rather than you picking a quality and hoping the resulting size happens to work. Both use the same underlying compression; the difference is just which variable you are solving for.
Format changes the ceiling, not just the number
A JPG and a WebP at the same quality number do not produce the same visual result or the same file size, since the two formats compress differently under the hood; WebP at an equivalent visual quality generally produces a smaller file than JPG. This means the format choice sets the ceiling on how small a file can get before quality visibly drops, before the quality slider itself even comes into play. If a JPG cannot reach a target size cleanly, converting to WebP first, then compressing, sometimes reaches the same target at a noticeably higher visual quality than pushing the JPG's own quality setting lower would have.
PNG is a different kind of compression entirely
Everything above describes lossy compression, JPG and WebP's approach of discarding detail. PNG compresses losslessly instead, by reducing the number of distinct colours in the image rather than by discarding detail, which works well for flat graphics with few colours to begin with and works poorly for a photograph's thousands of subtle shades. A PNG that will not compress much no matter what quality setting is tried is usually a sign the source is a photo, not that the compressor is failing; converting to JPG or WebP first is the actual fix in that case, not pushing the PNG compressor harder.
Resizing first often beats compressing harder
If a file still needs to shrink further after quality alone has been pushed as low as looks acceptable, reducing the pixel dimensions usually gets further than pushing quality lower still. A smaller image needs fewer pixels' worth of data regardless of quality setting, and a modest resize, say to three quarters or half the original width, often produces a smaller, cleaner looking result than the same target size reached purely through a very aggressive quality setting on the full size image. This matters most when the image will never actually be displayed at its original full resolution anyway, which describes most photos destined for a screen rather than a large print.
Compressing a whole batch consistently
Picking a quality setting on one representative image from a batch, checking it against the compare view, then applying that same setting to the rest of the batch produces more consistent results than eyeballing every single image individually, and it is much faster for a batch of any real size. A batch of similar images, photos from the same shoot or the same camera, usually compresses consistently well at the same quality setting, since they share similar levels of detail and similar content.